Want to make some nice line art? The first step is to turn a photo into a sketch, and that's exactly what we'll do
now. This tutorial is fairly easy and consists of just 6 steps.
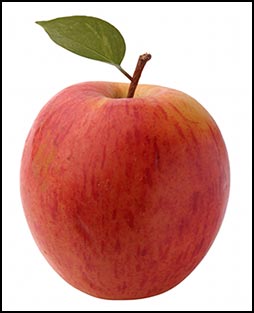
Start with your selected photo. Prep it so it's exactly
the dimensions and resolution you want your final document to be.
STEP 1 - Duplicate The
Background LayerFirst duplicate the background layer. Go
Layer> New> Layer via Copy. Now we have
2 layers, the Background Layer, and Layer 1.
STEP 2 - Desaturate The PhotoWith
Layer 1 selected, choose
Image> Adjustments> Desaturate. This gives us a grayscale version of the photo.
STEP 3 - Duplicate Layer 1At this point you must duplicate Layer 1. With Layer 1 selected,
go
Layer> New> Layer via Copy. Now we have 3 layers, the Background Layer, Layer 1 and Layer 2.
Next
we'll be working with Layer 2.
 STEP 4 - Invert Layer 2
With Layer 2 selected, go
Image> Adjustments>
Invert. This will make your photo look like a negative.
STEP 5 - Change The Layers Blend
Mode To Color DodgeIn the
Layers Palette change the
Layers Blend Mode for this layer (Layer 2)
to
Color Dodge. This will make your photo almost completely white, but don't panic! Everything is going to work out
just fine.
STEP 6 - Apply The Gaussian Blur FilterGo
Filter> Blur>
Gaussian Blur. When the dialog box appears start by moving the
Radius Slider all the way to the left. Once you've
done that you can start to slowly move it to the right.
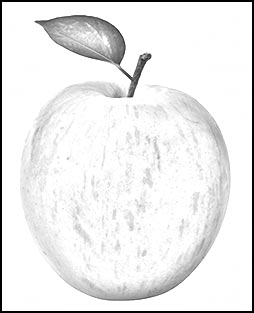
Now here comes some real Photoshop magic — because
as you move the slider your sketch will start to appear.
At this point take time to experiment and make sure you are getting the desired effect.
Bigger numbers create a more
pronounced effect, but at some point this will turn your sketch back into a photo, which you don't want, so when you reach
that point simply nudge the slider to the left just a little and that should do it!
For my apple sketch I used a Radius
setting of 9.8 pixels.
Experiment With Settings
This technique will also work
with the Motion Blur Filter and the Radial Blur Filter. The reason I mention this is sometimes an image will not work as expected,
and so you have to try different methods.
If you have ever tried converting a pencil drawing to a pattern you will find this out